
Hosting Video Sessions
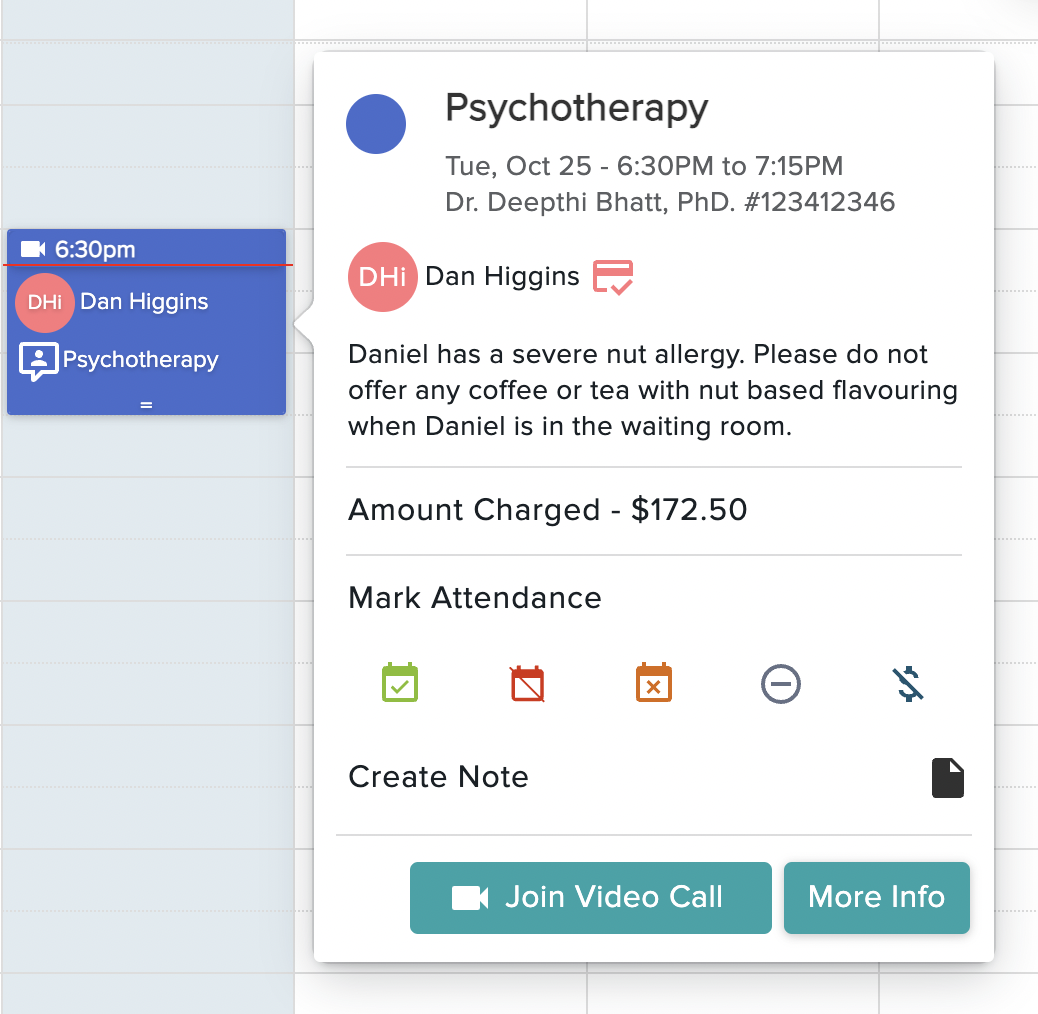
To start a scheduled video session, simply click on a session with the Video icon in the Calendar. The Session Overview window will have a Join Video Call button that you can click to begin hosting the session:
It is important to know that there is a 30 minute + / - window for joining a video session. Clients will be able to enter the waiting room for the session up to 30 minutes before it starts, and the join button will remain active for them up to 30 minutes after the session end time as well, in case they are running late.
Zencare Practice Management Video currently supports individual, couple, and family sessions. For couples or families, it is important that you link the accounts, and have all relevant Attendees listed on the session you create (see guide here). When multiple Attendees are connected on one session, and it is a Video session, each client is able to access their Client Portal and connect individually. Remember to ensure each Attendee is set up with a Client Portal account, just as you would with an individual session.
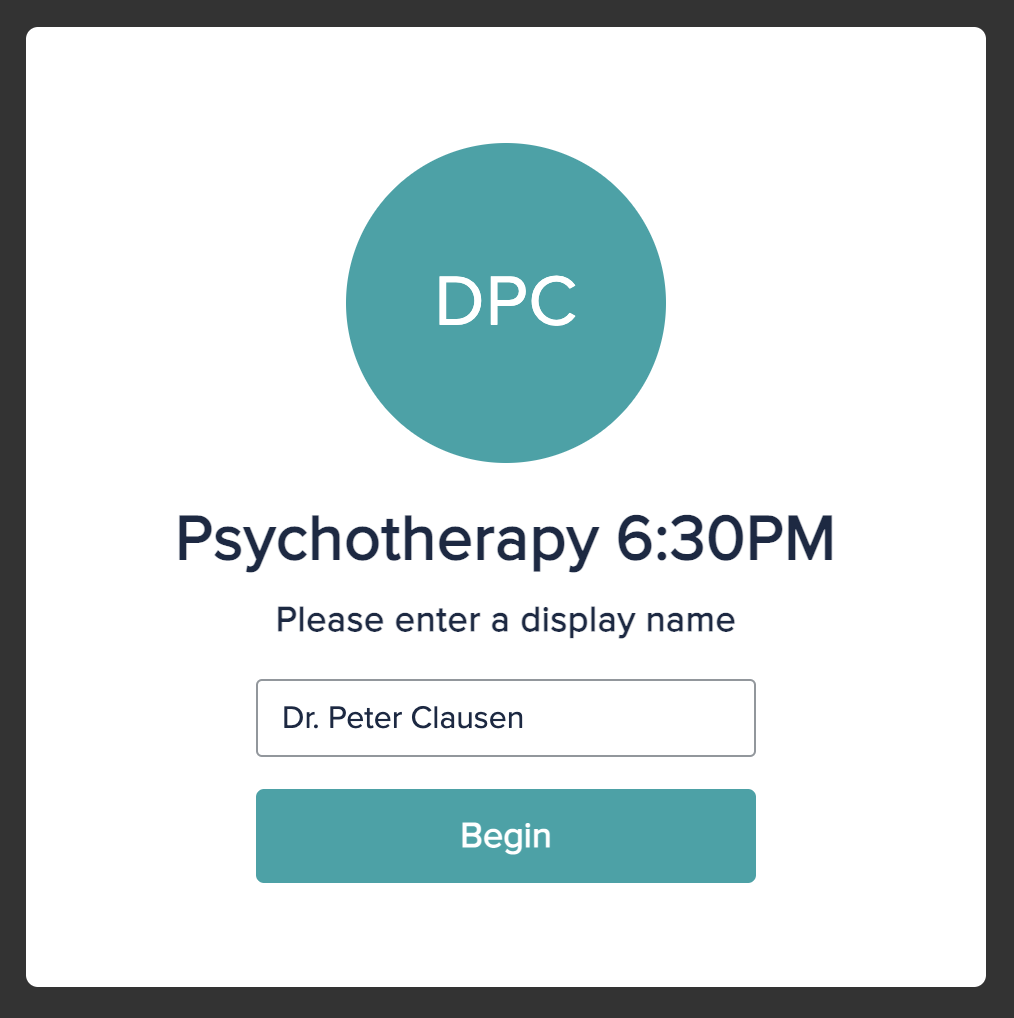
Clicking the Join Video Call button will open the secure video session in a new browser tab on your computer. Before you can enter the session, you’ll also be prompted to confirm your display name. The name displayed here is defaulted to show the first and last name, as well as the title from your therapist profile. You can then click the Begin to enter the session:
If this is your first time using the Video Therapy tool, your browser will most likely prompt you to grant access to your camera and microphone. You can allow access, and then these devices will be connected to the session for your call. If you’ve used the video feature previously on the same device, your camera and microphone should connect automatically for every session going forward based on the access you’ve previously granted.
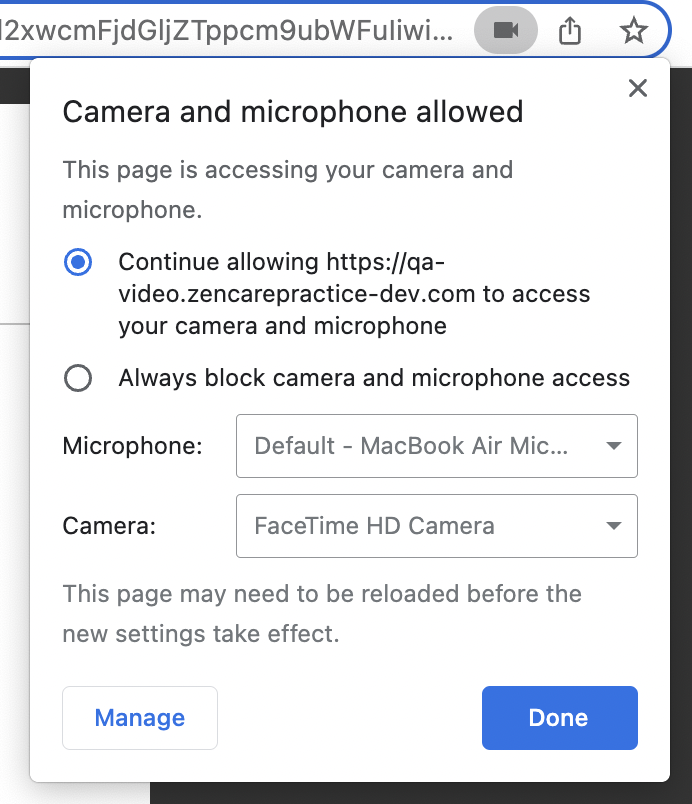
If your browser does not prompt you, or you have already blocked access, you should see an icon in the top-right of your screen with a red "x". Click this icon to manage your permissions:
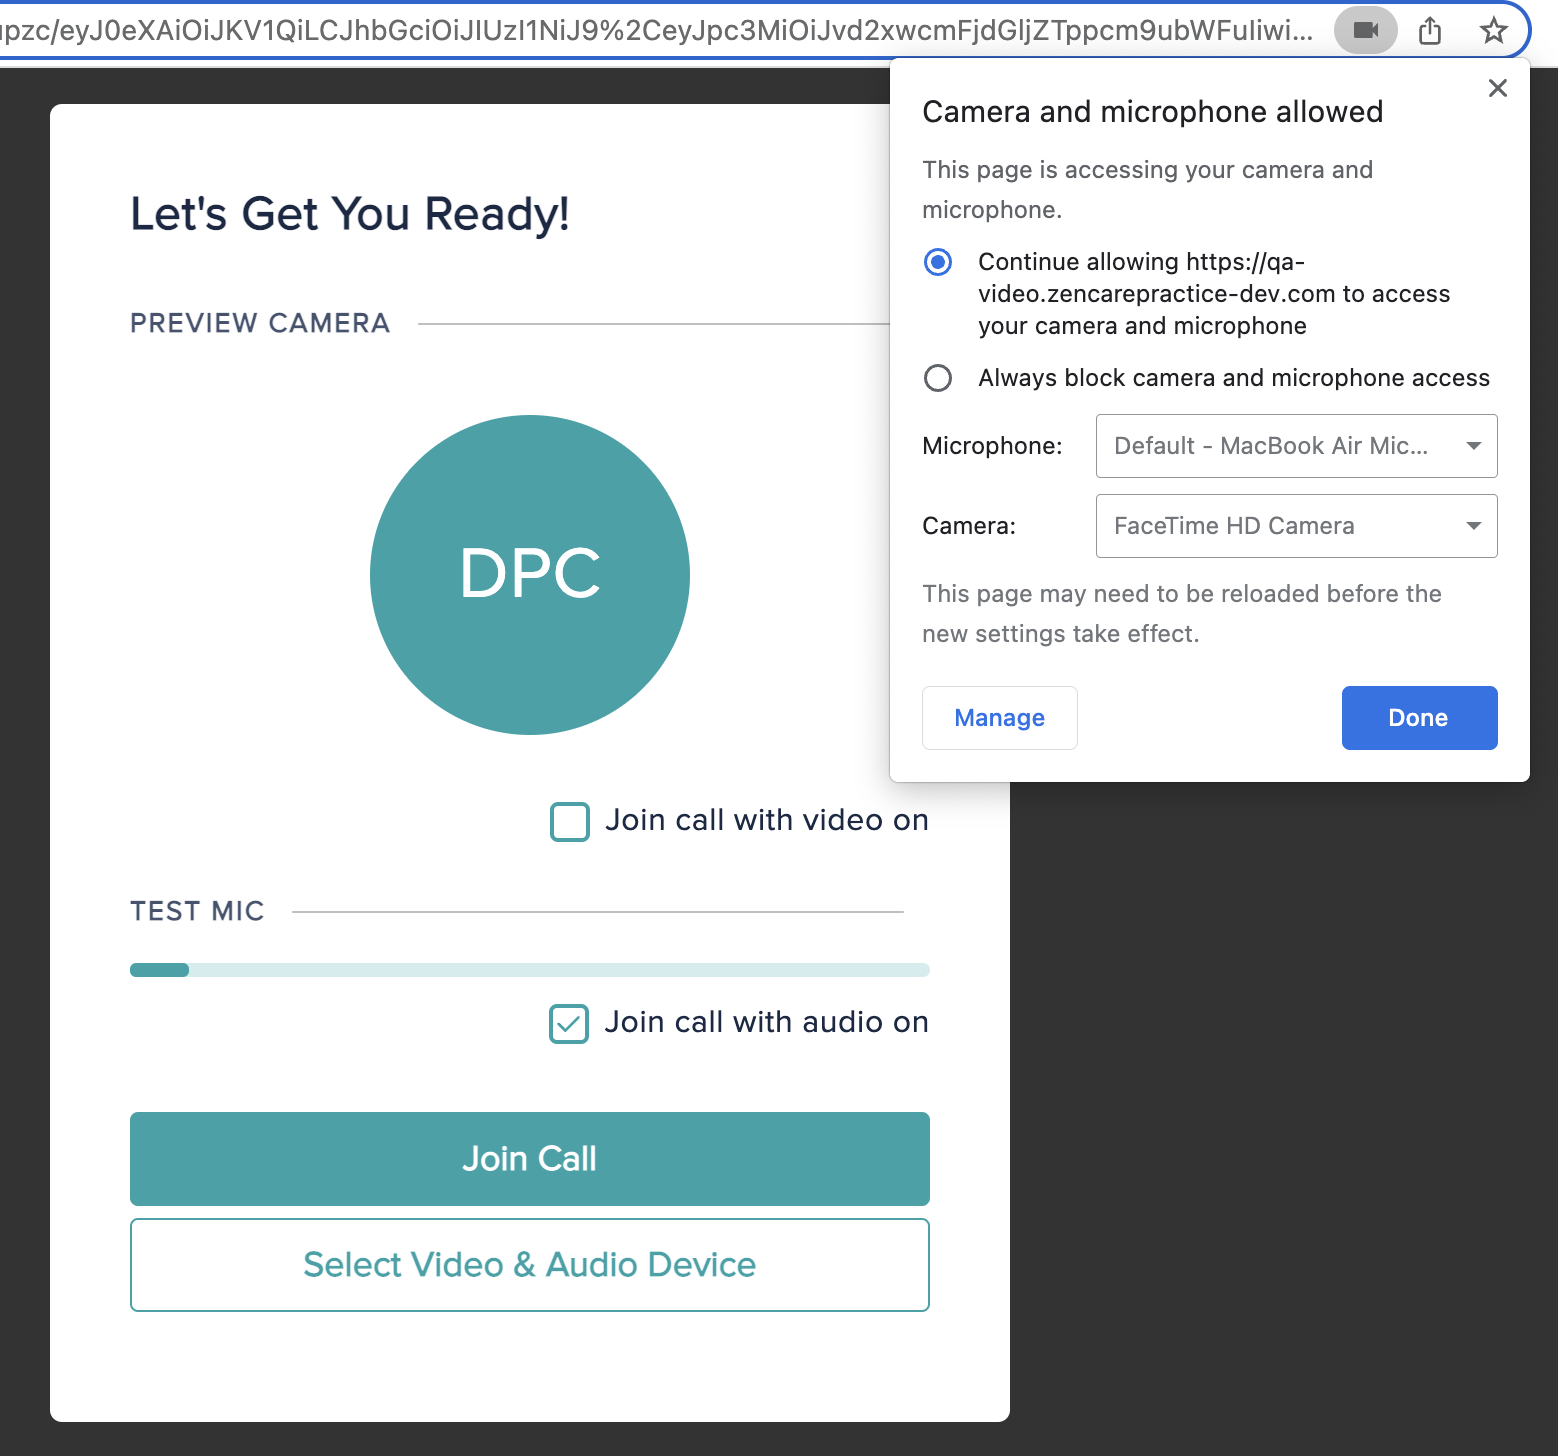
Make sure that you select the option to allow access to the webcam, then click the Done button. You can then refresh your browser and the session will reload with access having been granted to the camera and microphone.
You can start the session by clicking the Start Session button.
You’ll be entered into the session, where you’ll see yourself or your initials in the top left-hand corner of the page, the call actions panel at the bottom center of the screen, and the attendees panel to the upper right-hand side of the screen. You can click the People button to see other people on the call and admit them from the waiting room:

The people control panel allows you to see who has joined the session, and gives the clinician hosting the session the ability to admit clients to the session. When clients join a video session, they are automatically placed into a virtual waiting room until you are ready to admit them to the session and begin. You have complete control over who can join your session and when they’ll be admitted, which ensures the session is secure and private.
Attendees are grouped in the People On This Call window as either Practitioners or Participants. You will be able to see who has camera on or off, as well as who has their microphone on or muted.
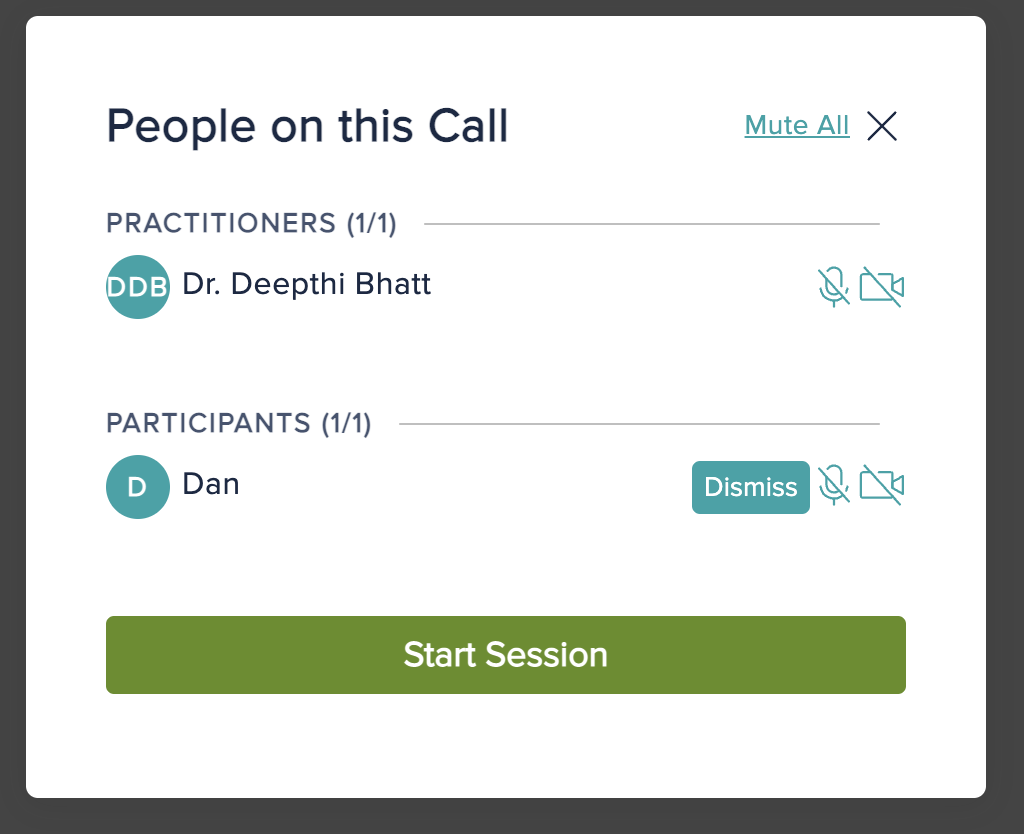
When you have clients in the waiting room of the session, the Start Session button in the attendees control panel will become active.
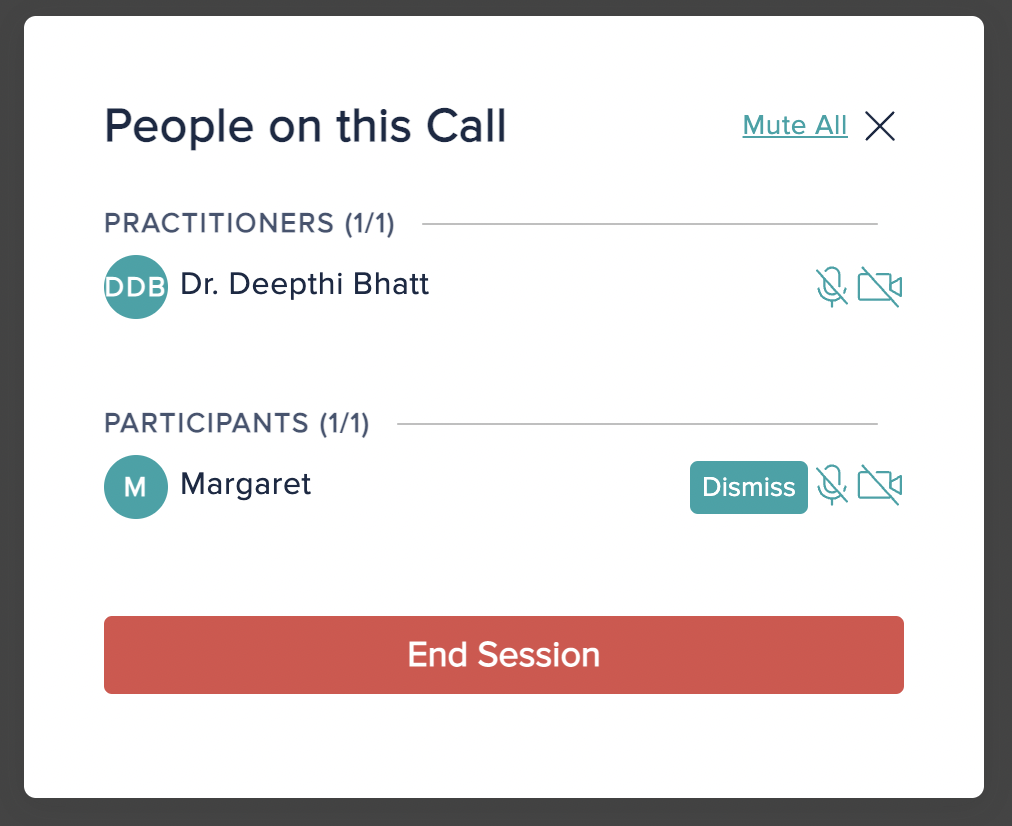
Clicking the Start Session button will admit all of the clients in the waiting room to the session. Once you have clicked the start session button and all clients have been admitted to the session, this button will now appear as the End Session button.
You can also admit clients to the session individually by clicking the Admit next to their name in the people panel:
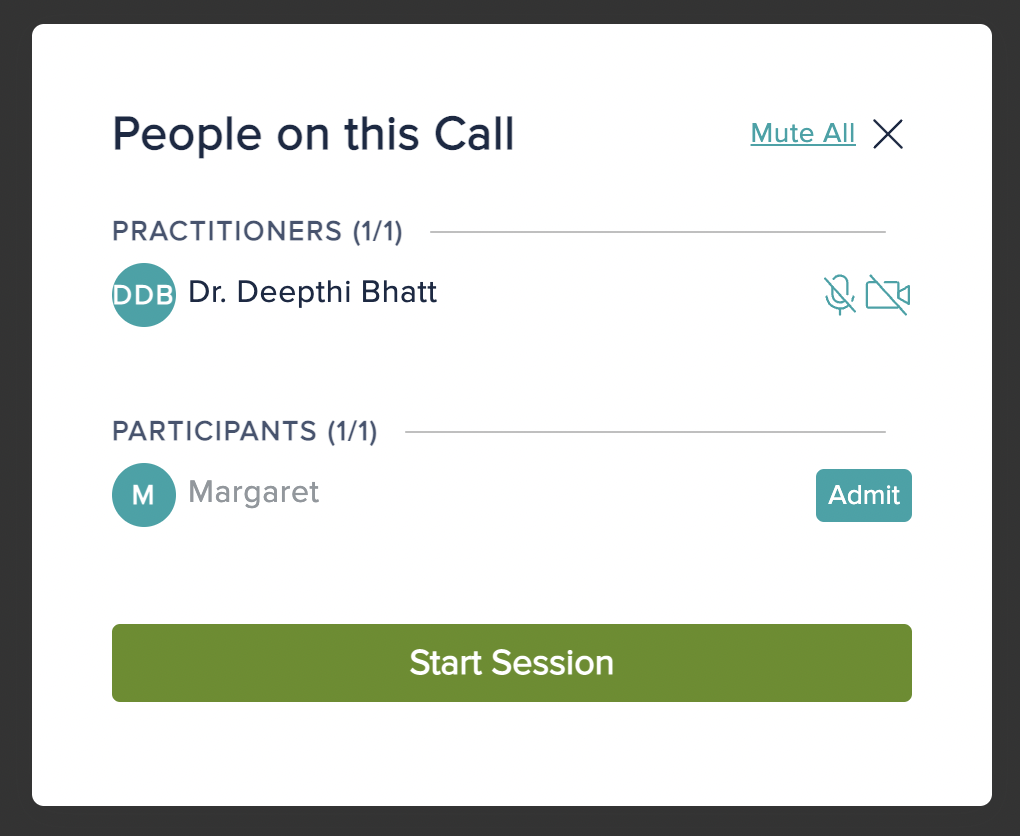
This is useful if more than one person is attending the session and you’d like to get started by having a private conversation with one client before the other is admitted.
Alternatively, once clients have entered the session, you will have the option to dismiss any attendees as needed at your discretion. For any clients that have been admitted to the session, you’ll see the Dismiss option next to their name in the people menu:
When a client has been admitted, or you’ve chosen to start the session for all, you will see all of the clients you have admitted to the session on screen:
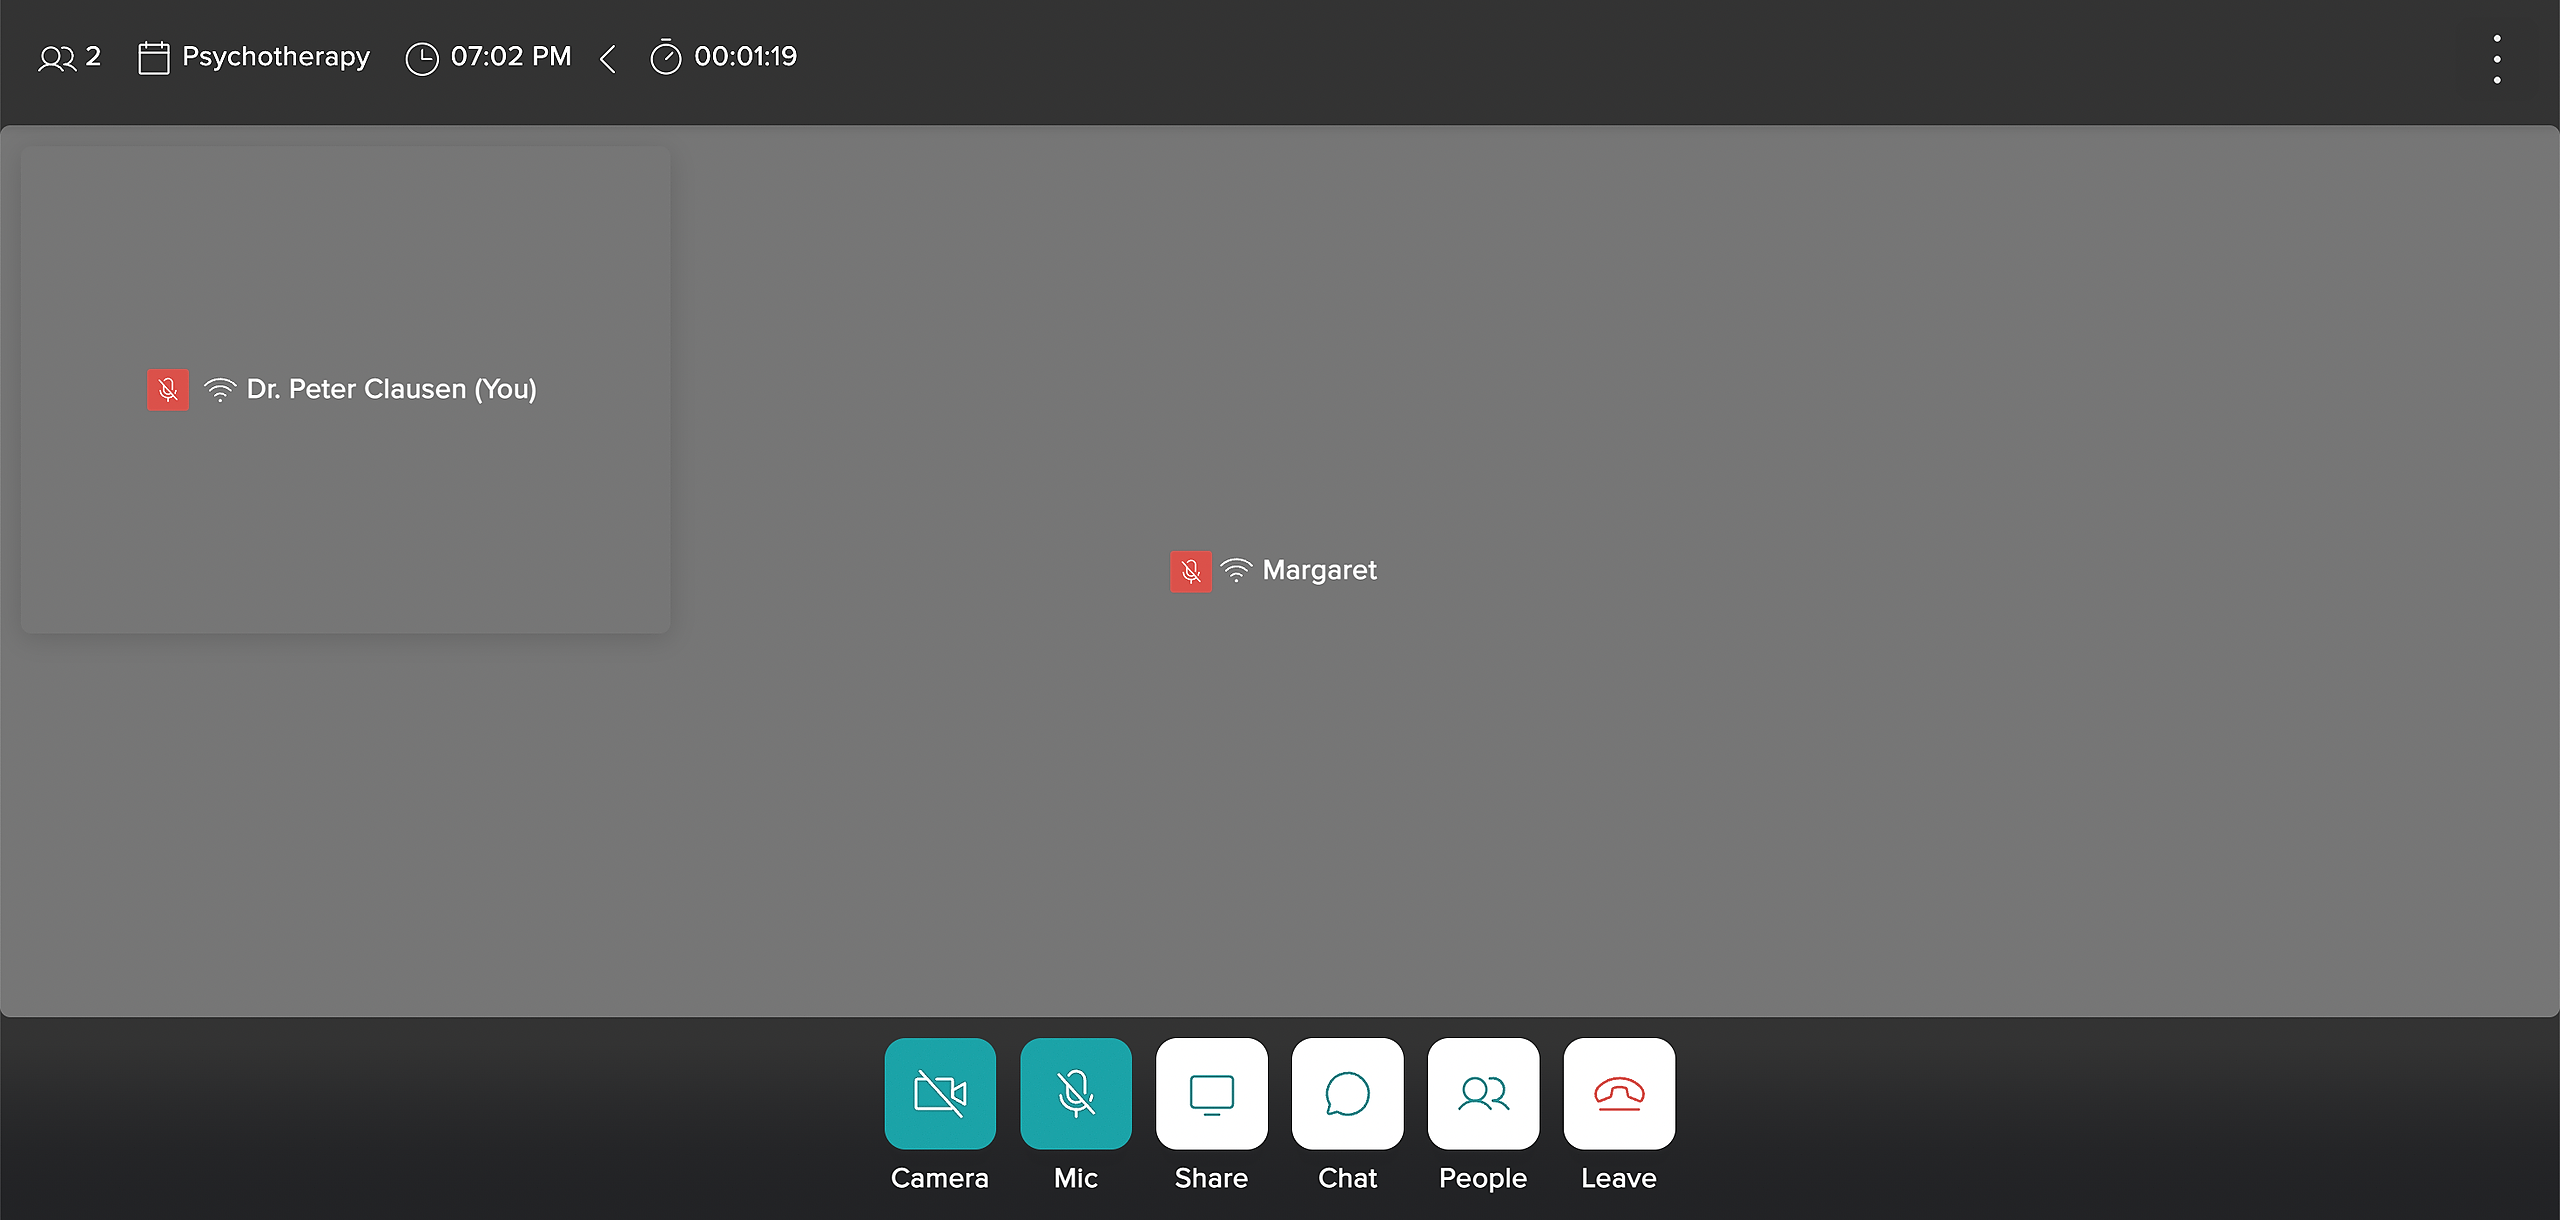
The screen will display the client who has joined your session enlarged and in the middle of the screen. You will see yourself, or your avatar if the webcam is off, in the upper left-hand corner of the screen.
You will see the client’s name at the bottom of their display, as well as a connection indicator to the right of their name. This indicator lets both of you know how good their connection is based on their internet. The same connection indicator appears to the right of the name displayed below your webcam display. If there are any issues with connectivity during the session, both of you can clearly identify which party has a weak internet connection.
If either you or the client have your microphone muted, you’ll see a red mute indicator to the left of your display name.
If there are multiple clients attending the session and you would like to be the only one who can broadcast audio, you can mute all of the attendees by clicking the Mute All button in the people control panel:

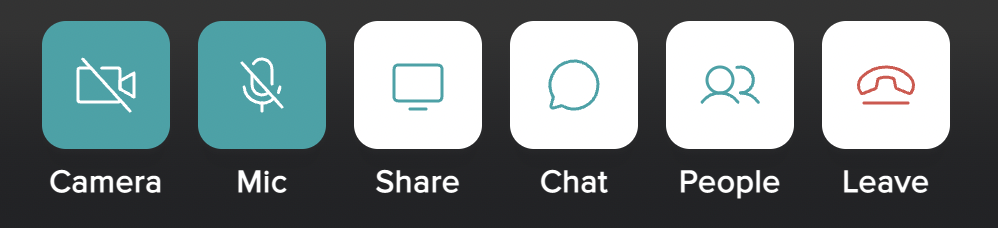
The actions in the panel at the bottom of the screen will allow you or the client to:
- Turn off/on your webcam
- Turn off/on your microphone
- Share your screen
- Start a chat with others on the call
- Open People menu
- Leave and end the call
During the call, if either you or the client would like to focus your attention solely on the other party, you can hide the display of yourself from view. This helps clinicians and clients more fully engage one another during the session and minimizes the distraction of seeing oneself on screen if desired. To hide the display of yourself from your view, simply click the third icon in the actions panel.
Ending Video Sessions
To end a video session, simply click the End Session option in the people control panel:

A prompt will appear asking you to confirm if you would like to permanently end the session for all parties:
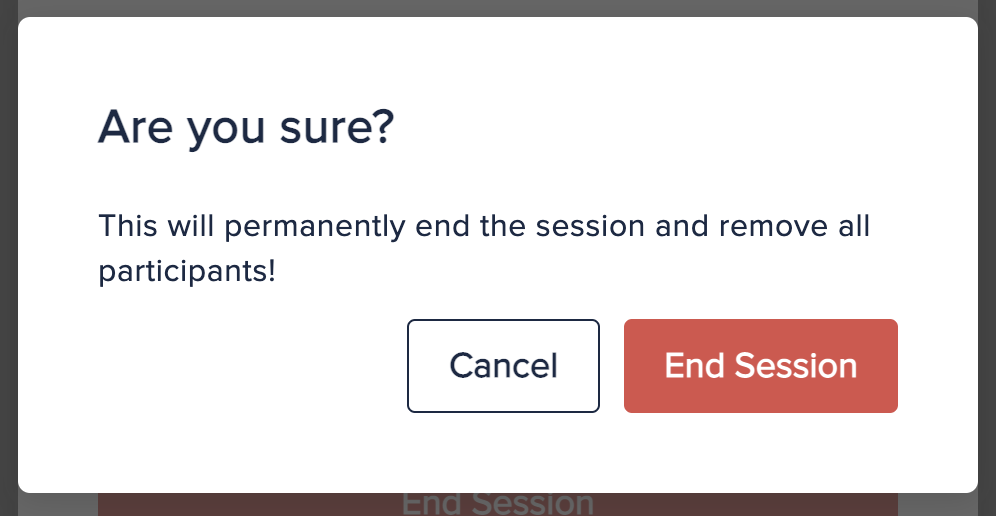
Yourself and all of the clients who were participating in the session will be dismissed. You will see a confirmation that the session has ended.
If anyone tries to rejoin a session that has been ended, they will see this same screen confirming that the session has already ended.
You also have the option to simply leave the call by clicking the red button with the telephone icon in the actions panel at the bottom of your screen. When you do so, the client will see a message on their end that tells them you’ve left the session:

Clients also have the option to leave the session any time they’d like by clicking this button in their action panel.