
Welcome to your Zencare Practice Management account! When you first login to Zencare Practice Management, you will open on the Calendar. Before we start scheduling sessions we need to configure a few details. In the side navigation bar, click Settings.
Step One: Start with your Practice Details
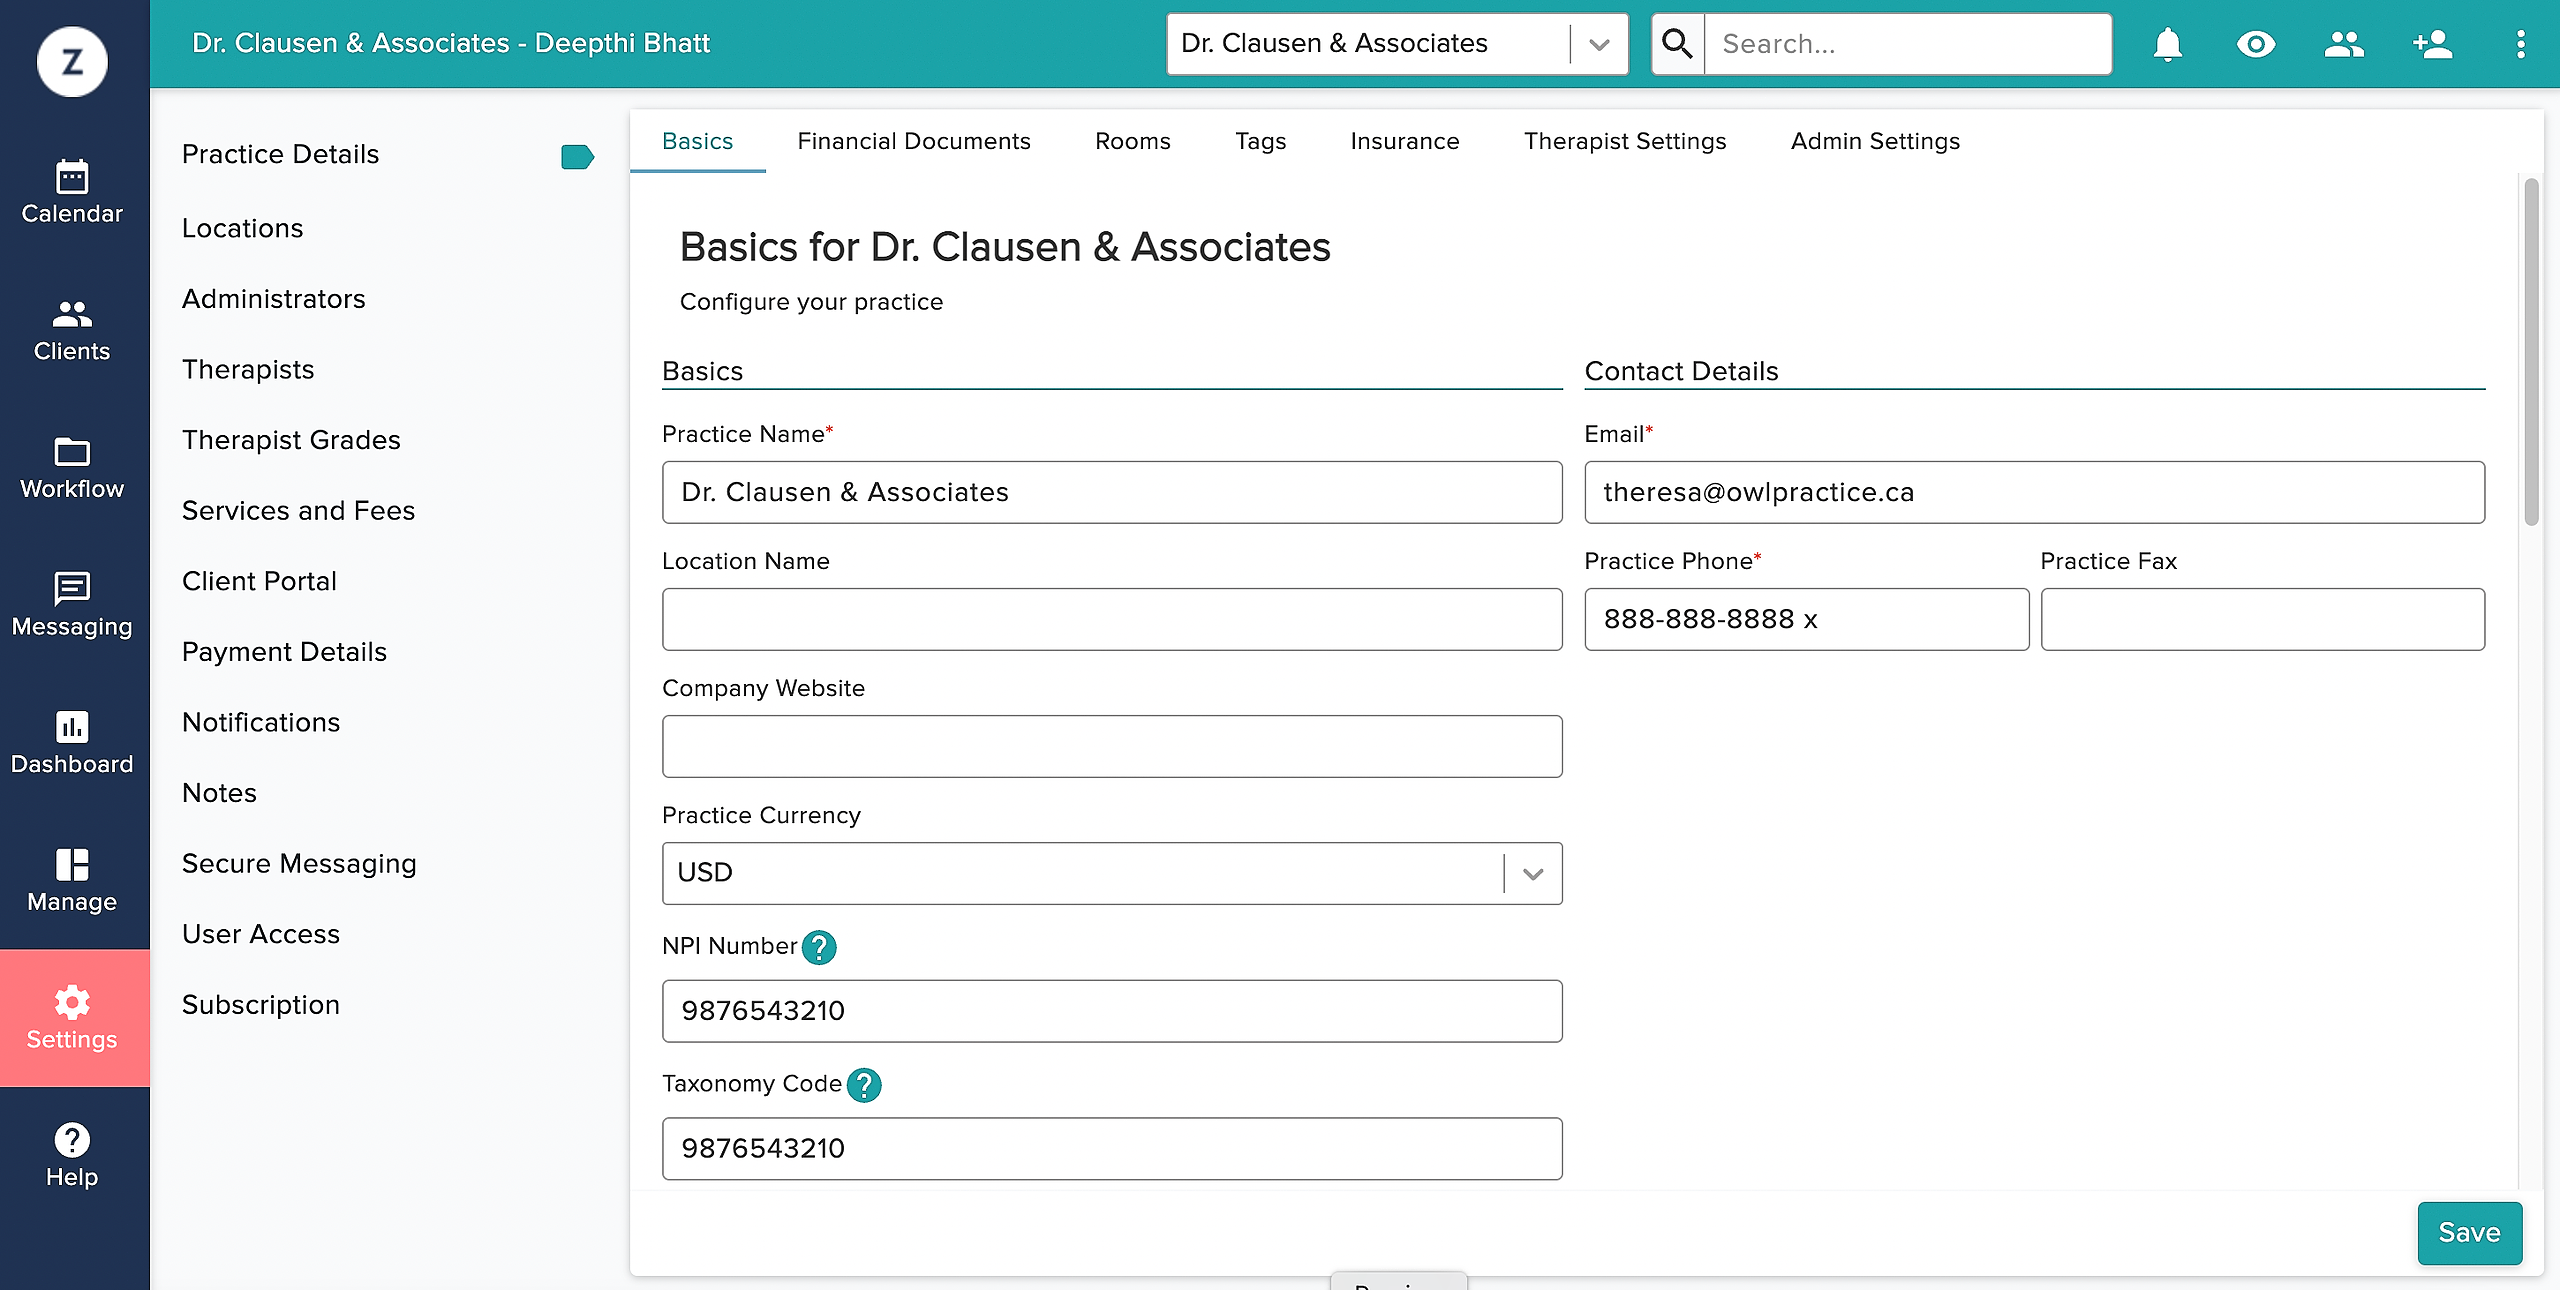
Practice Details contains all of the basic contact details for your unique practice: Practice Name, Address, Contact Information, etc. You can upload your Logo here as well. The information entered here is used on all financial documents and notes exports, so ensure that these details are accurate and routinely updated.
Upload your logo under Practice Details by clicking the Choose an Image button, and finding the file you will be using as your logo. Once uploaded you can adjust the size of your logo using the scroll bar.
Your image file must be under 450 kilobytes (kb), and in PNG, GIF, or JPG format (don't worry - most images are in these formats).
When you have finished updating your Practice Details, be sure to hit the green Save button to save your work!
Step Two: The Therapist Profile
The next area of Settings you will configure is your Therapist Profile. Zencare Practice Management uses this "profile" to know which therapist is assigned to each client, and to correctly populate information to financial documents. To set this up, click on Therapists in the left side bar.
This will show you a list of all of your therapists. If you are using a Solo Edition of Zencare Practice Management, you'll only see your own name here! If you are using the Group Edition, you'll see all of your therapists listed here.

To edit your Therapist Profile, click on the checkbox next to your name. This will open a green edit bar at the top of the list. (This edit bar is a functionality of Zencare Practice Management - you'll see it all across the system!). Press the edit button in this bar.
This opens your Edit Therapist window. You'll want to fill in all of the fields here as they will be used for financial documents. You can also set the color of your client sessions.
Note - all client sessions will be this color. There is not a way to color code based on service type, client, or ad hoc.
Under the Invoices and Receipts area of this page, you can add additional Invoice and Receipt messages, opt to show your supervisor (if you have one), show the therapist, and include your signature.
You will also want to upload your Therapist Signature, to be used on financial documents and to sign session notes with!
You'll do this very similarly to how you uploaded your logo:
- Press the Choose an Image button to find your digital file
- Once you have uploaded the file, drag and drop the Signature Size bar to adjust the size.
Just as with logos, your signature image file must be under 450 kilobytes (kb), and in PNG, GIF, or JPG format (don't worry - most images are in these formats).
Step Three: Setting Your Availability
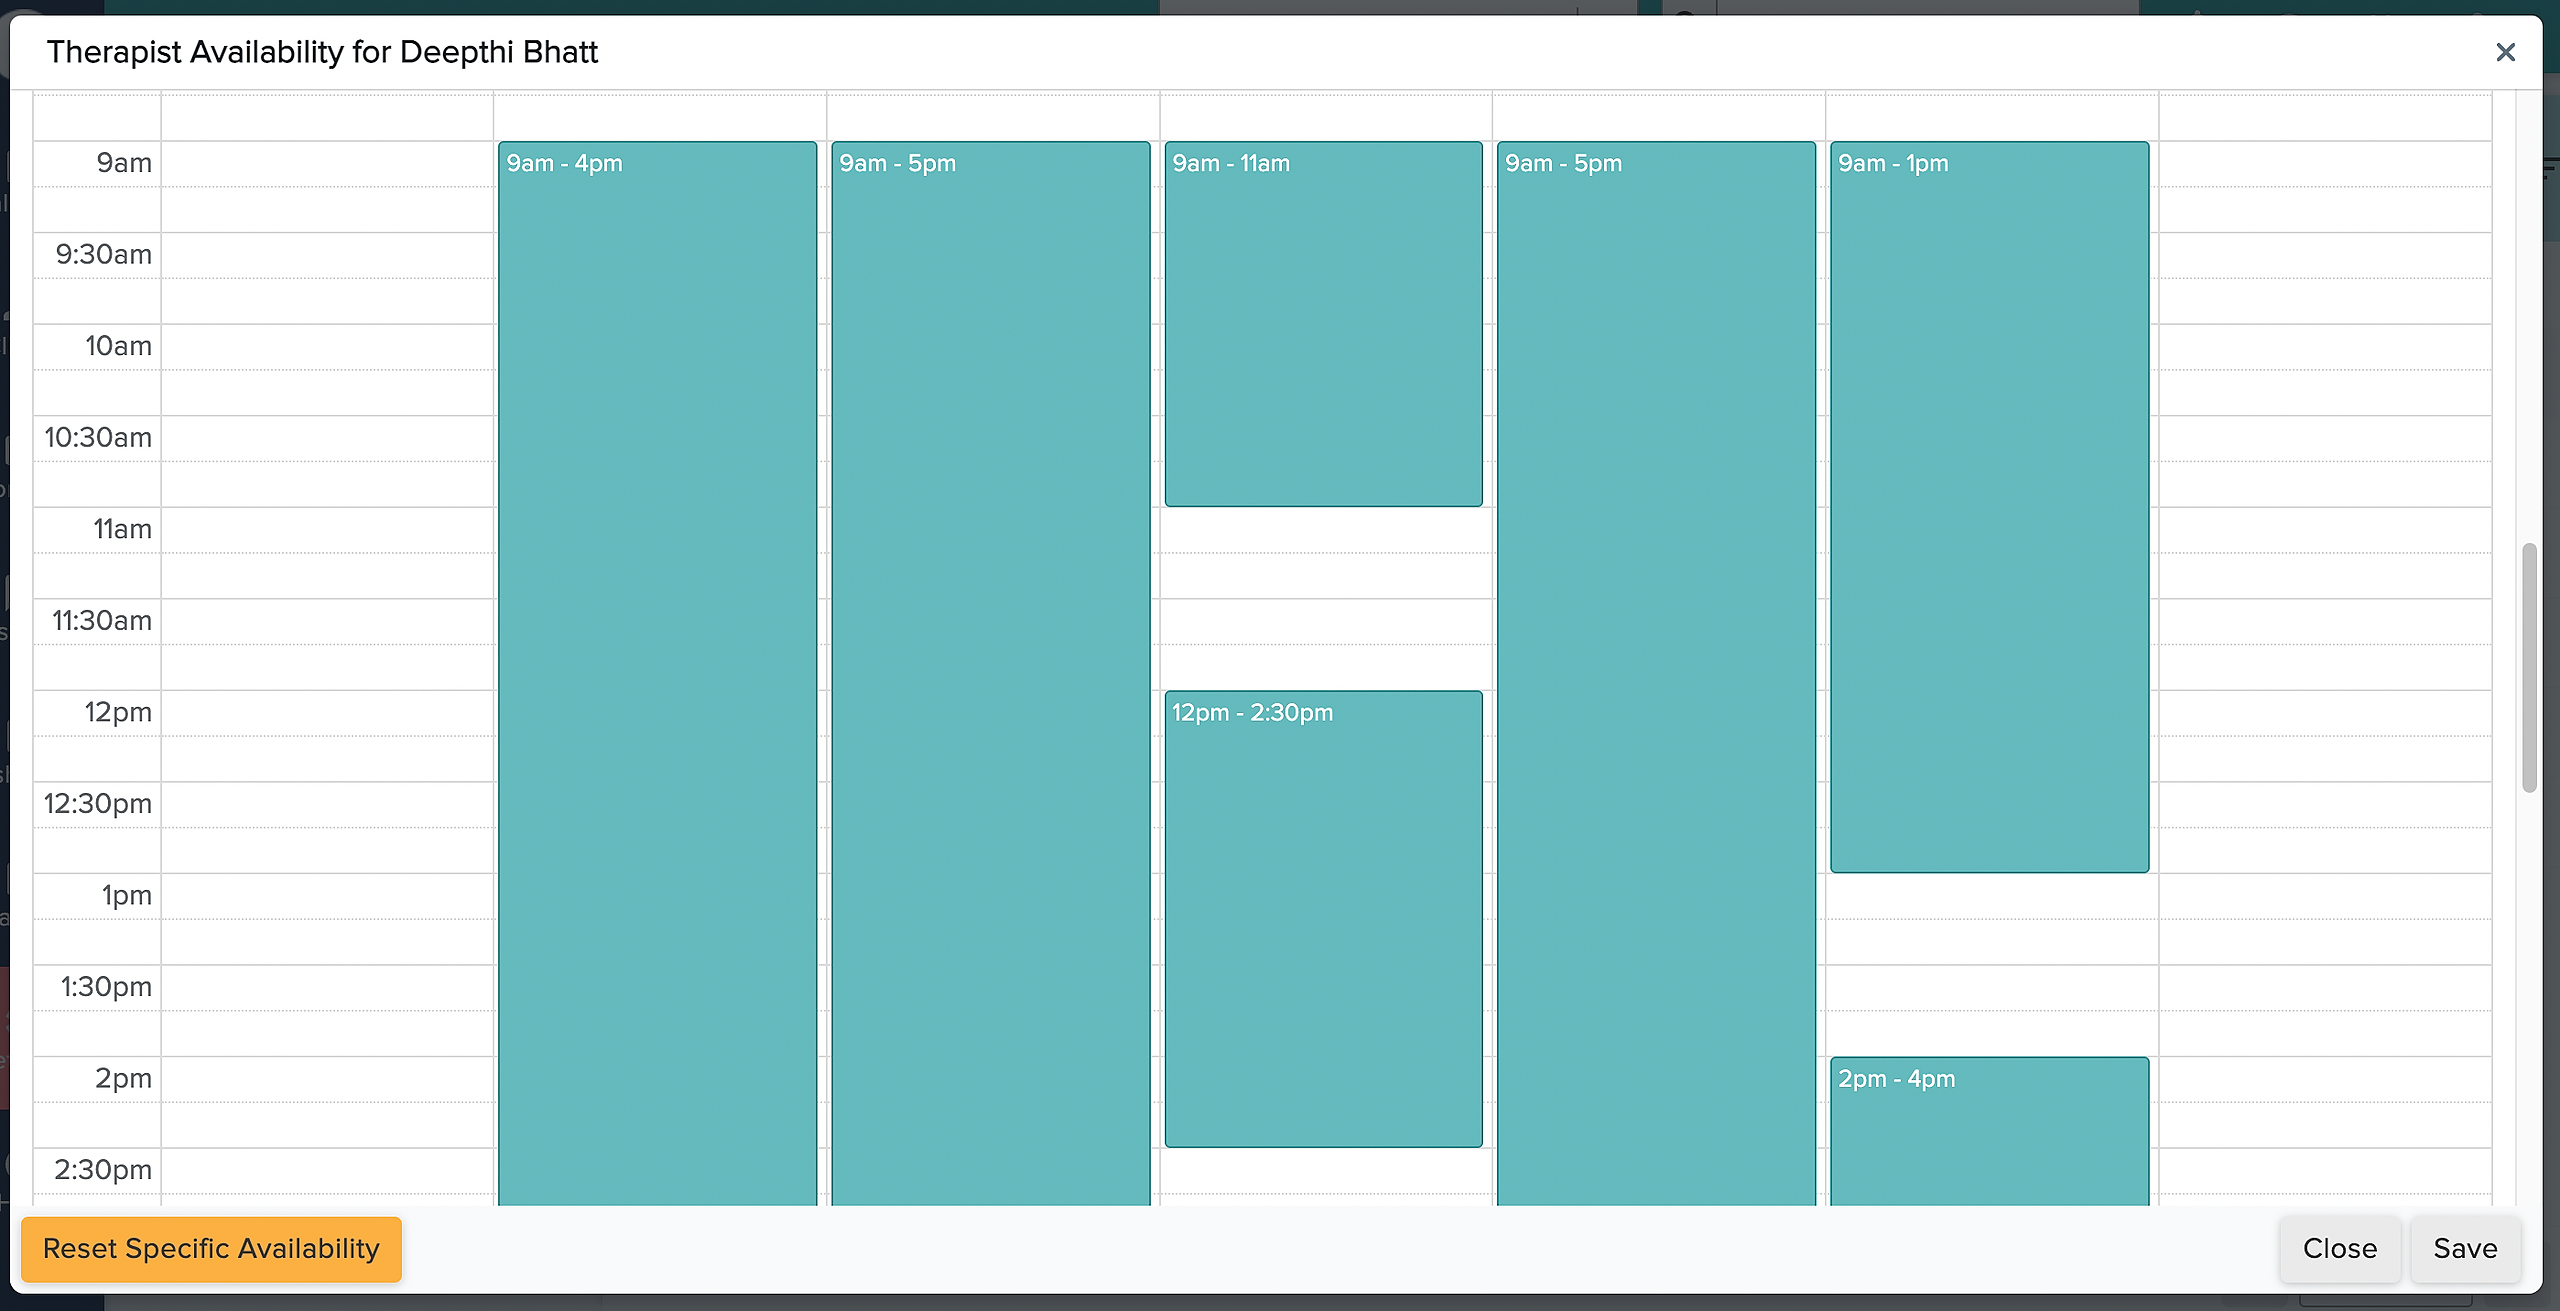
The last thing you will do in this area of your Settings is set your Availability. Your Availability states when you will be working, and typically when you are available for client bookings. If you’re using the Online Booking Portal, your Availability helps determine when Clients will be able to book sessions with you.
To set your availability:
- Head to Settings > Therapists, select your Therapist profile, then click the Availability button that appears in the green banner at the top.
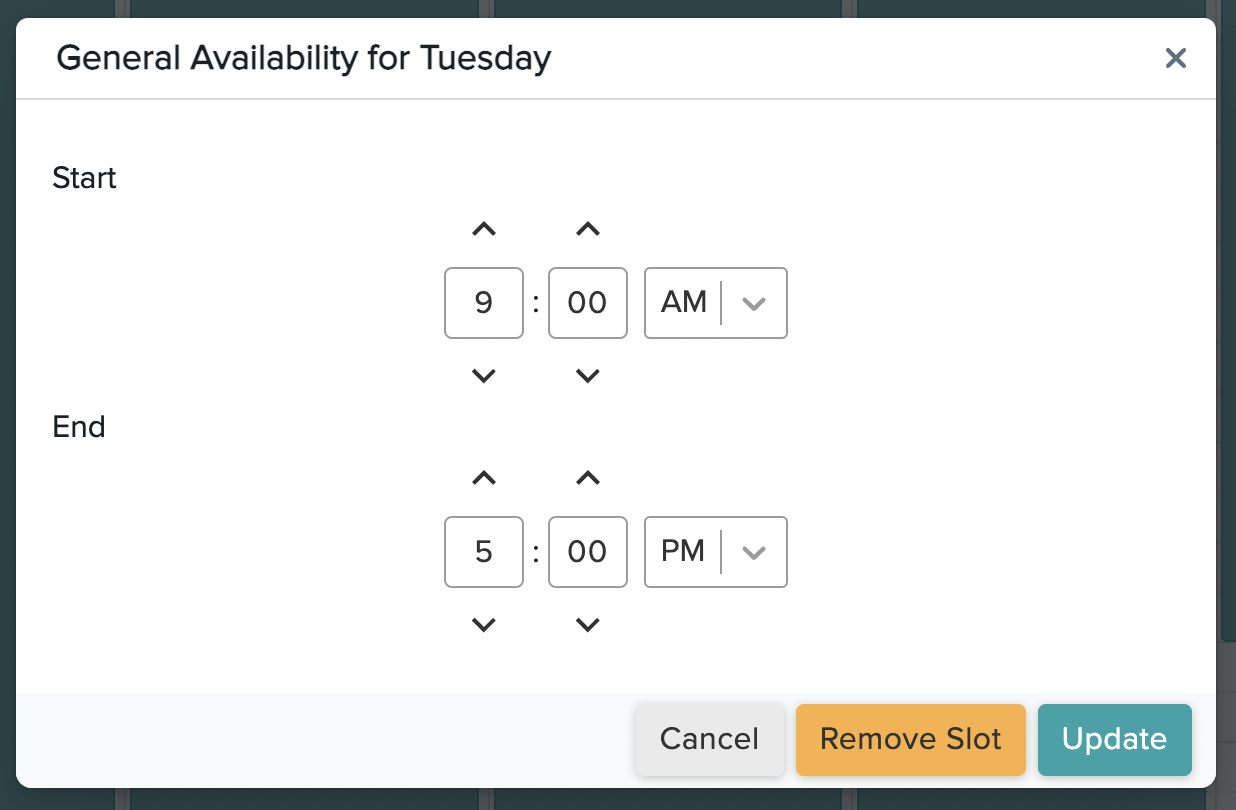
- You can click on the days outlined in the General view to create blocks of working hours.
- Click once on any of the blue availability boxes to edit, update, or remove them.
Make sure to hit the Save button to apply all of these updates to your Therapist Profile.
If you'd prefer to learn more about setting up your account in video format, be sure to check-out the "Account Setup" portion of our video on how to get started with Zencare Practice Management: