
To get started with Zencare Practice Management Payments you’ll need to complete the merchant enrollment process. You’ll need to submit an application to our payment processing partner for adjudication and approval. It is a quick and easy process that can be completed in 5-10 minutes from directly within your Zencare Practice Management account. The application process is broken down into 7 easy steps that are displayed at the top of the page throughout the enrolment window:

Please Note: you cannot use Zencare Practice Management Payments without a complete, approved merchant application on file. Only one application needs to be submitted per clinic instance. Only Owner user types are able to complete and submit merchant applications.
To start the application process, go to Settings > Payment Details and click the Get Started button that appears in the Zencare Practice Management Payments section of the page:

Clicking this button will begin the merchant enrolment process. You’ll be prompted to input the legal business name of your clinic and an email address. Click the Create Profile button to continue:

Step 1 - You’ll be asked to provide high-level details about your business, such as phone number, Tax ID, and website. The fields marked with a red * are required fields that must be completed for the application to be approved. Once you’ve provided the required information on the page, click the Next button to continue.

Step 2 - You’ll be required to provide details about your business location and billing address.

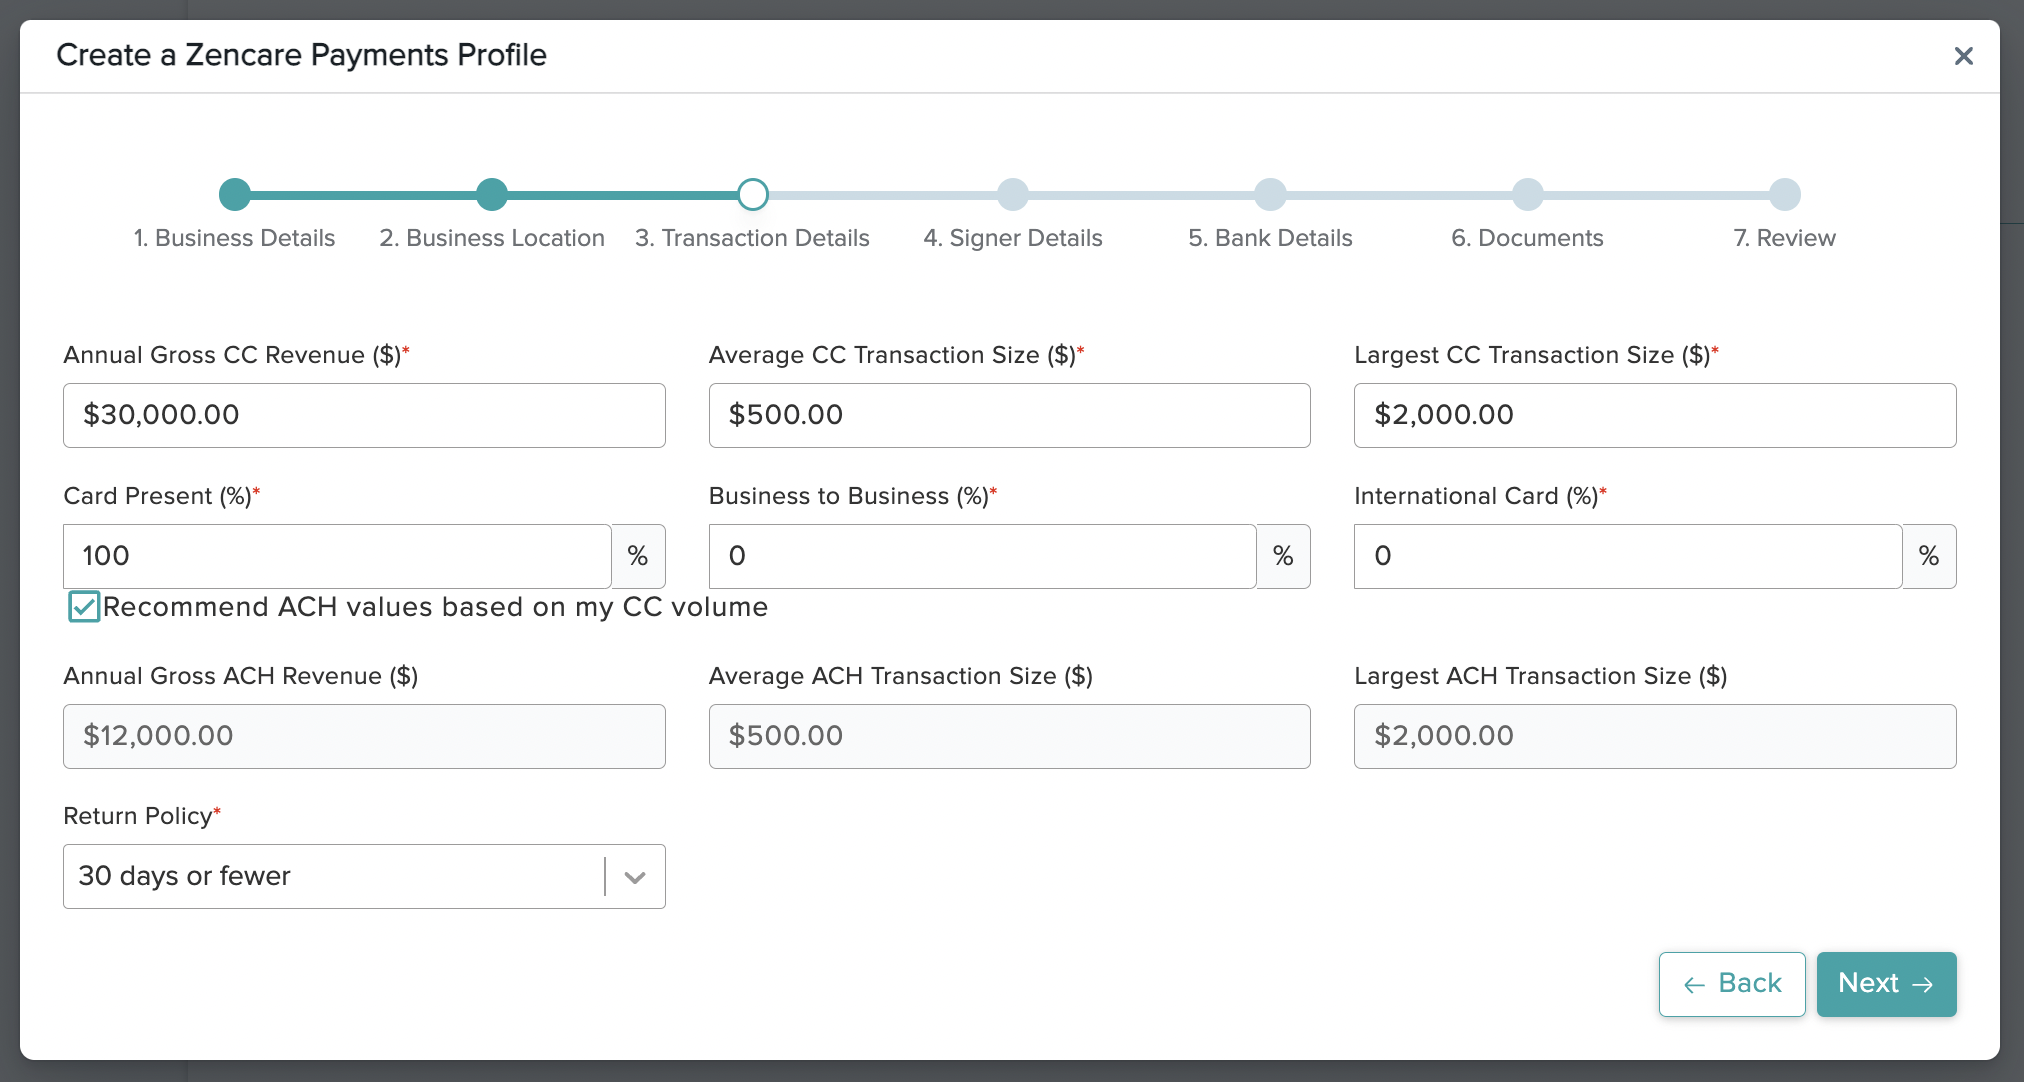
Step 3 - You’ll be required to provide information about your previous transaction processing history, such as annual gross revenue, processing revenues per credit card and ACH, and estimates as to your highest transaction volumes. It is important to keep in mind that even after your application has been approved our processing partner will monitor account activity as part of their standard protocol to prevent fraudulent processing activity, so it is important to be as accurate as possible with your estimates.
Step 4 - You’ll be asked to provide signer details. The signer is the authorized personnel or account holder of the bank account that will be used in conjunction with your merchant ID. You can add multiple signers to the application if needed by clicking the Add Another Representative button.

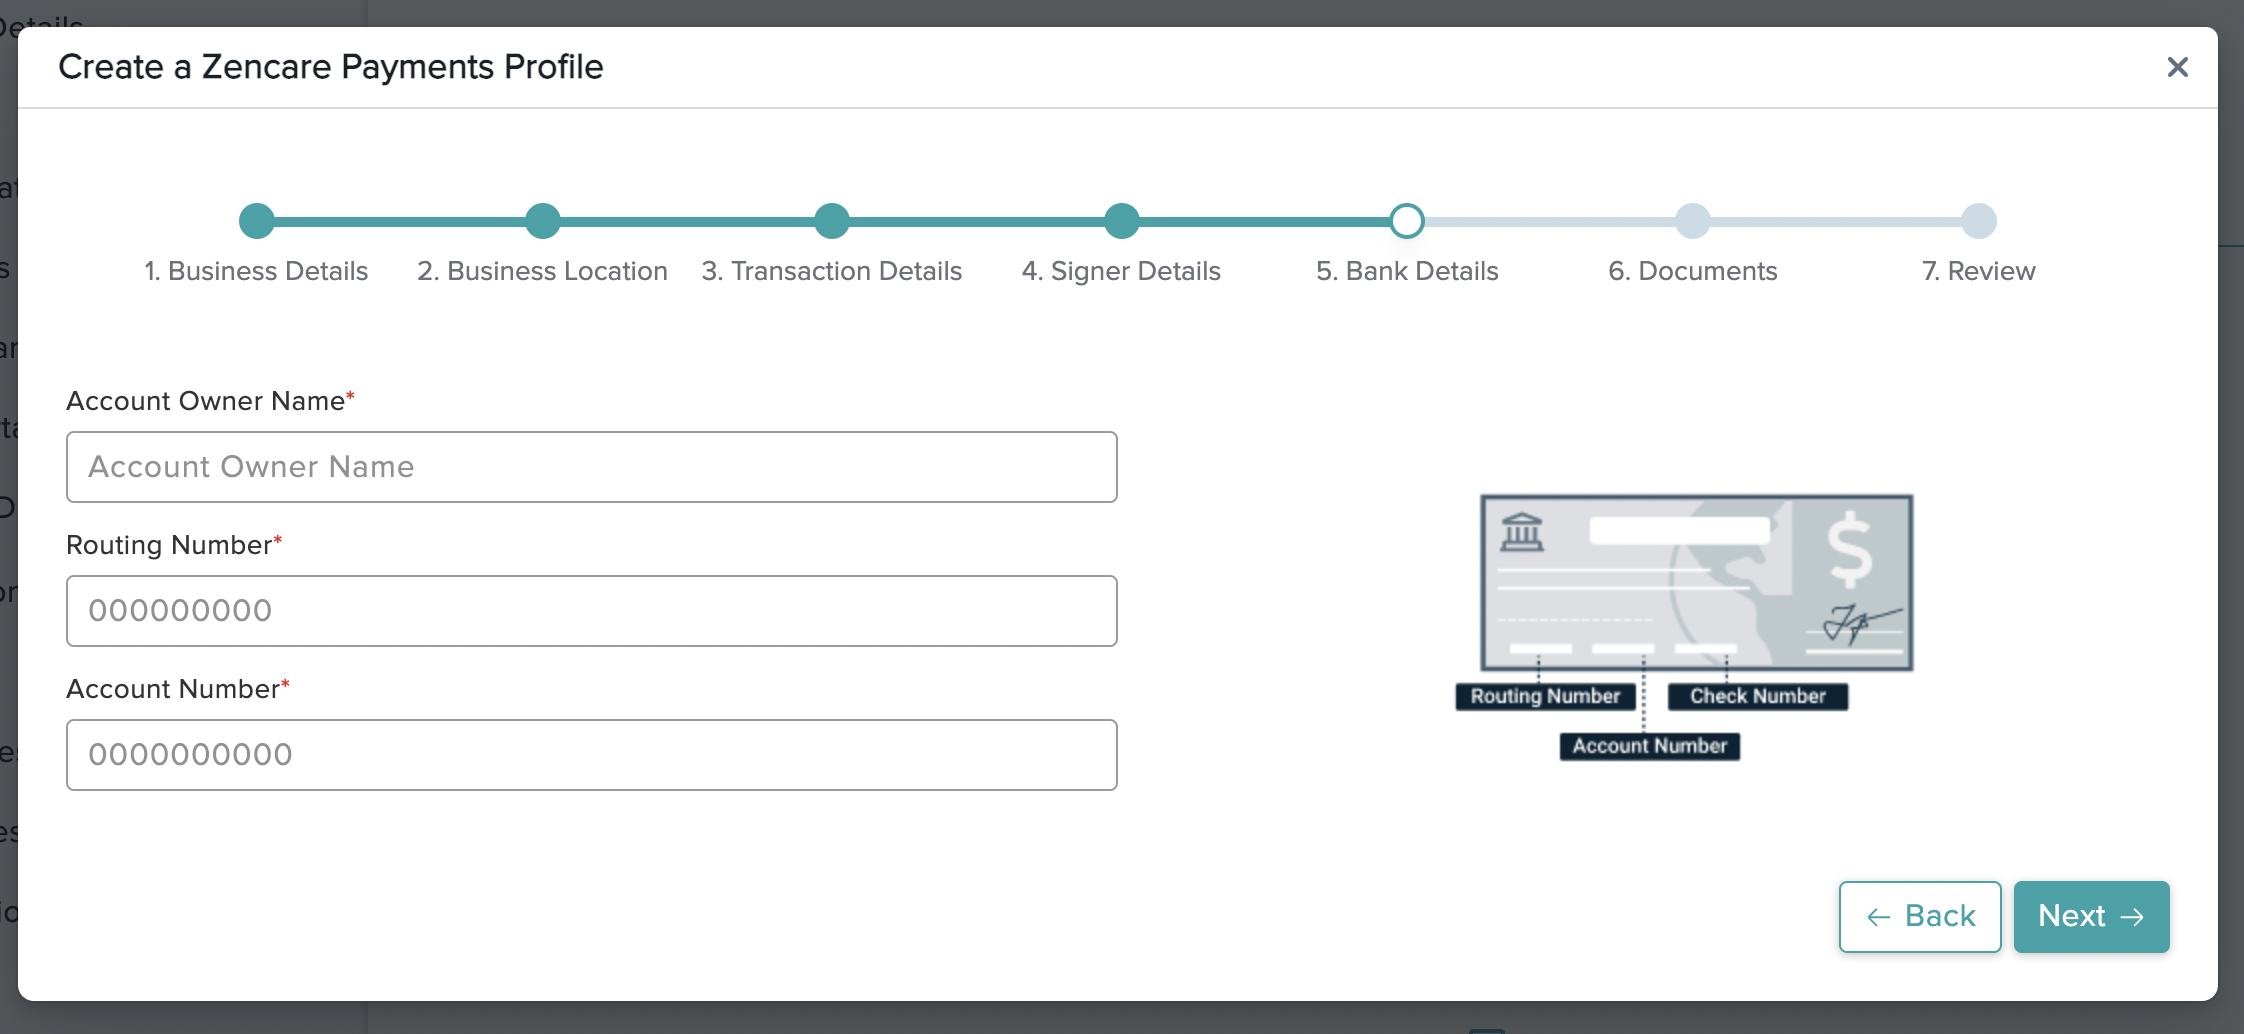
Step 5 - You’ll be required to provide the aforementioned bank account. You must provide the Account Owner Name, Routing Number, and Account Number. These details can be obtained directly from a check or through your banking institution.
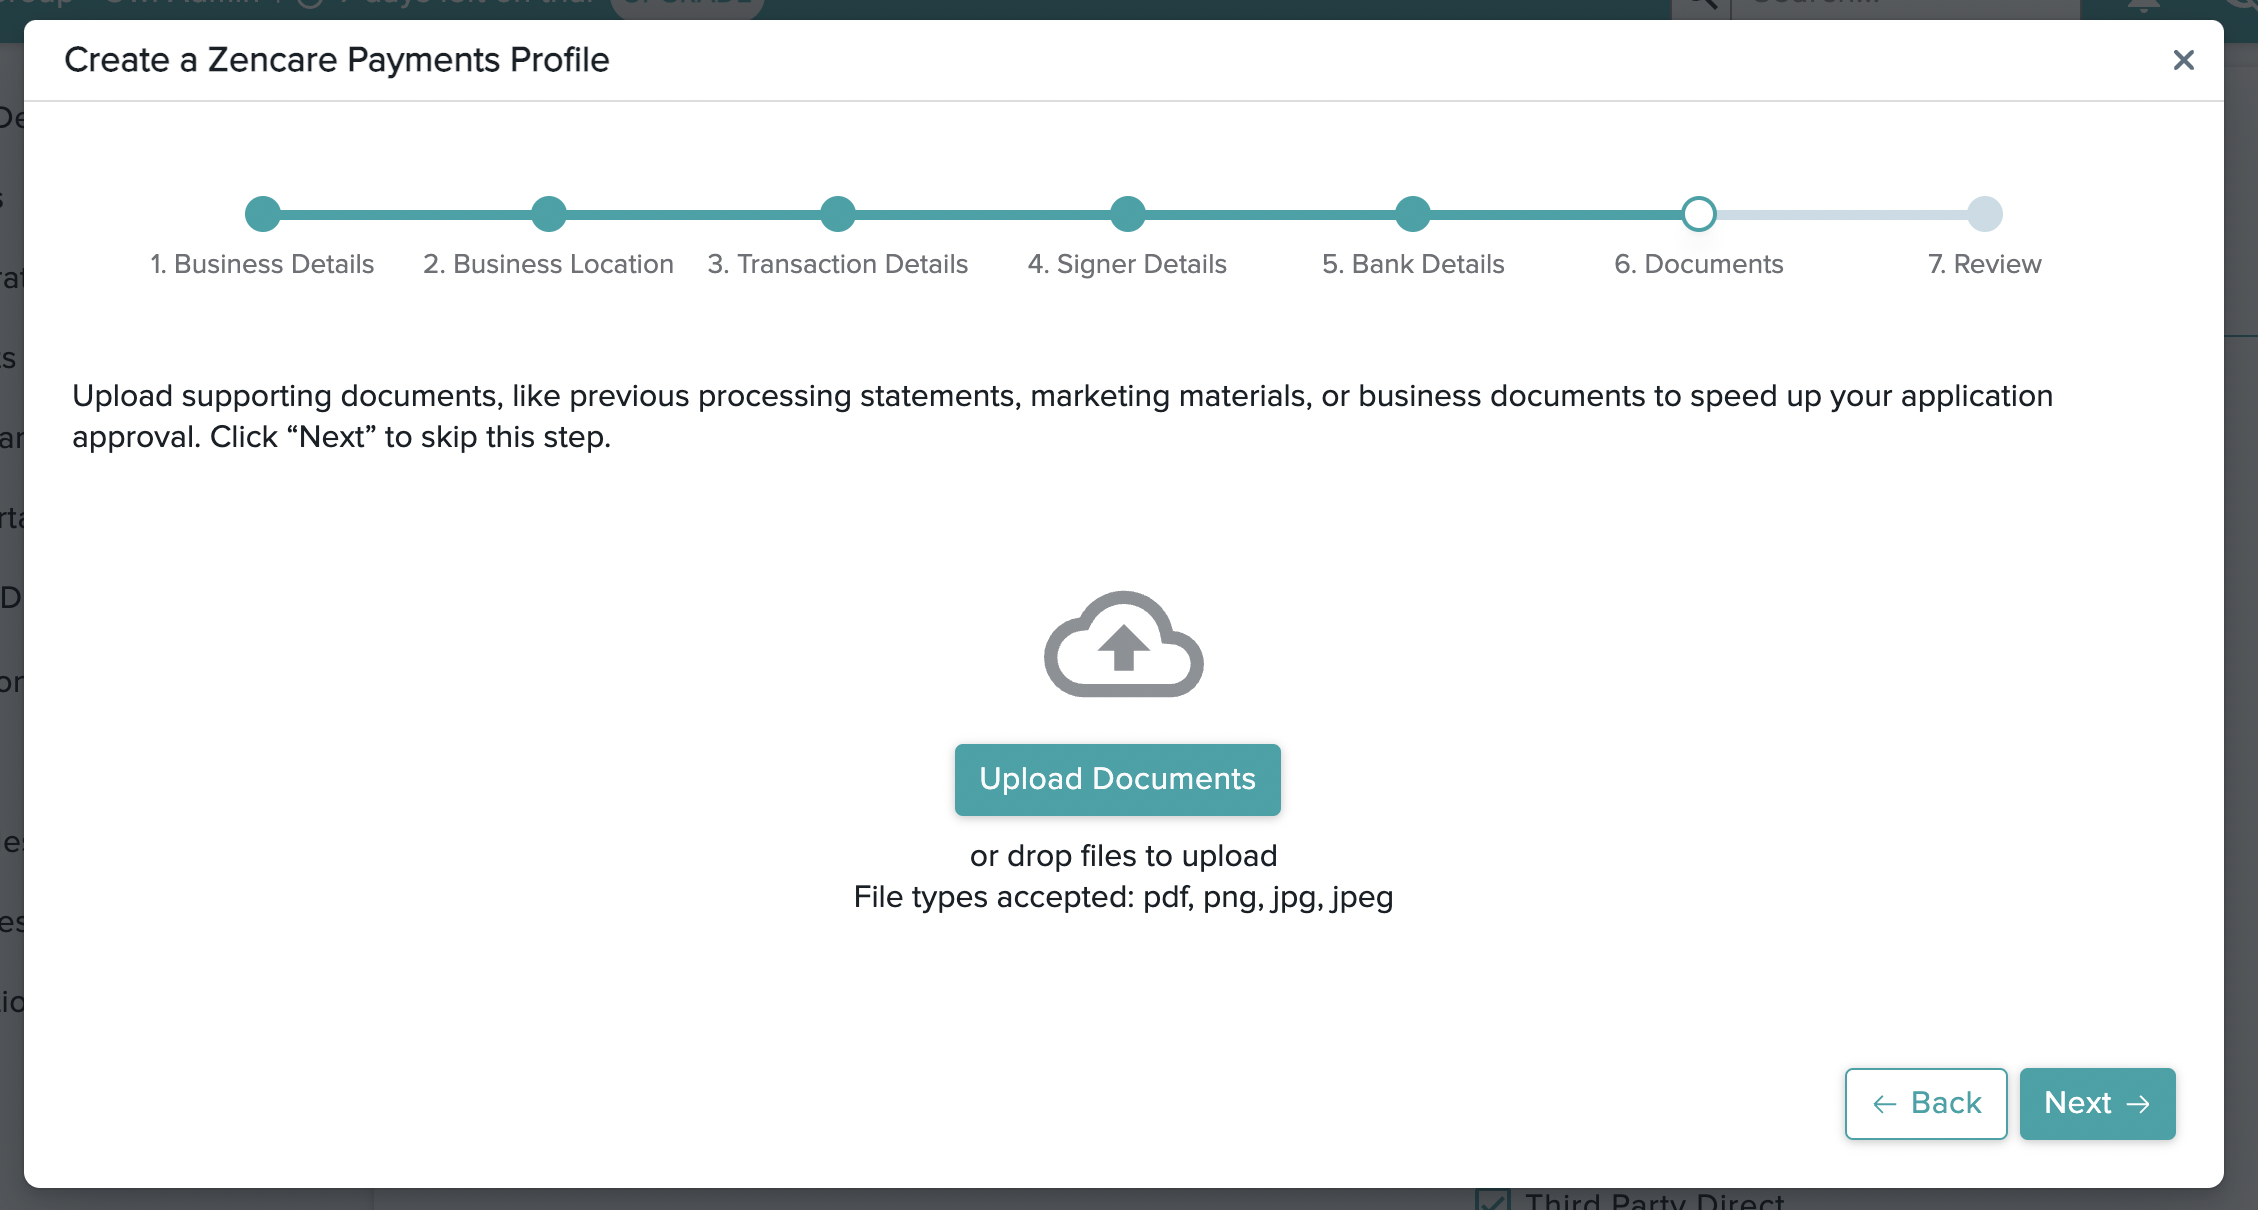
Step 6 - You’ll have the option to upload any supporting documentation that can expedite approval for your application. If you have previous processing statements for your business, processing reports, identification verifying documents, or any business related marketing materials that validate the application, you are encouraged to upload them here. You can click the Upload Documents button or you can drag and drop them directly from your computer to add them to the application.
Step 7 - The final step is to review the information you’ve provided throughout the application process and double check it for accuracy before submitting. You can scroll through the information displayed to confirm it.

All fields marked with a red * are required and must be completed before you can submit the application. If any information is missing, it will be displayed in bold red text for your convenience. You can simply click on the relevant step at the top of the application to go back into that section and edit it. For example, if you are reviewing the application details and notice missing bank account information for Step 5. Bank Details, you can click that dot on the application stepper to go back to that section specifically rather than backtrack through all of the steps again. If any required information is missing, the Submit Application button will not be clickable.
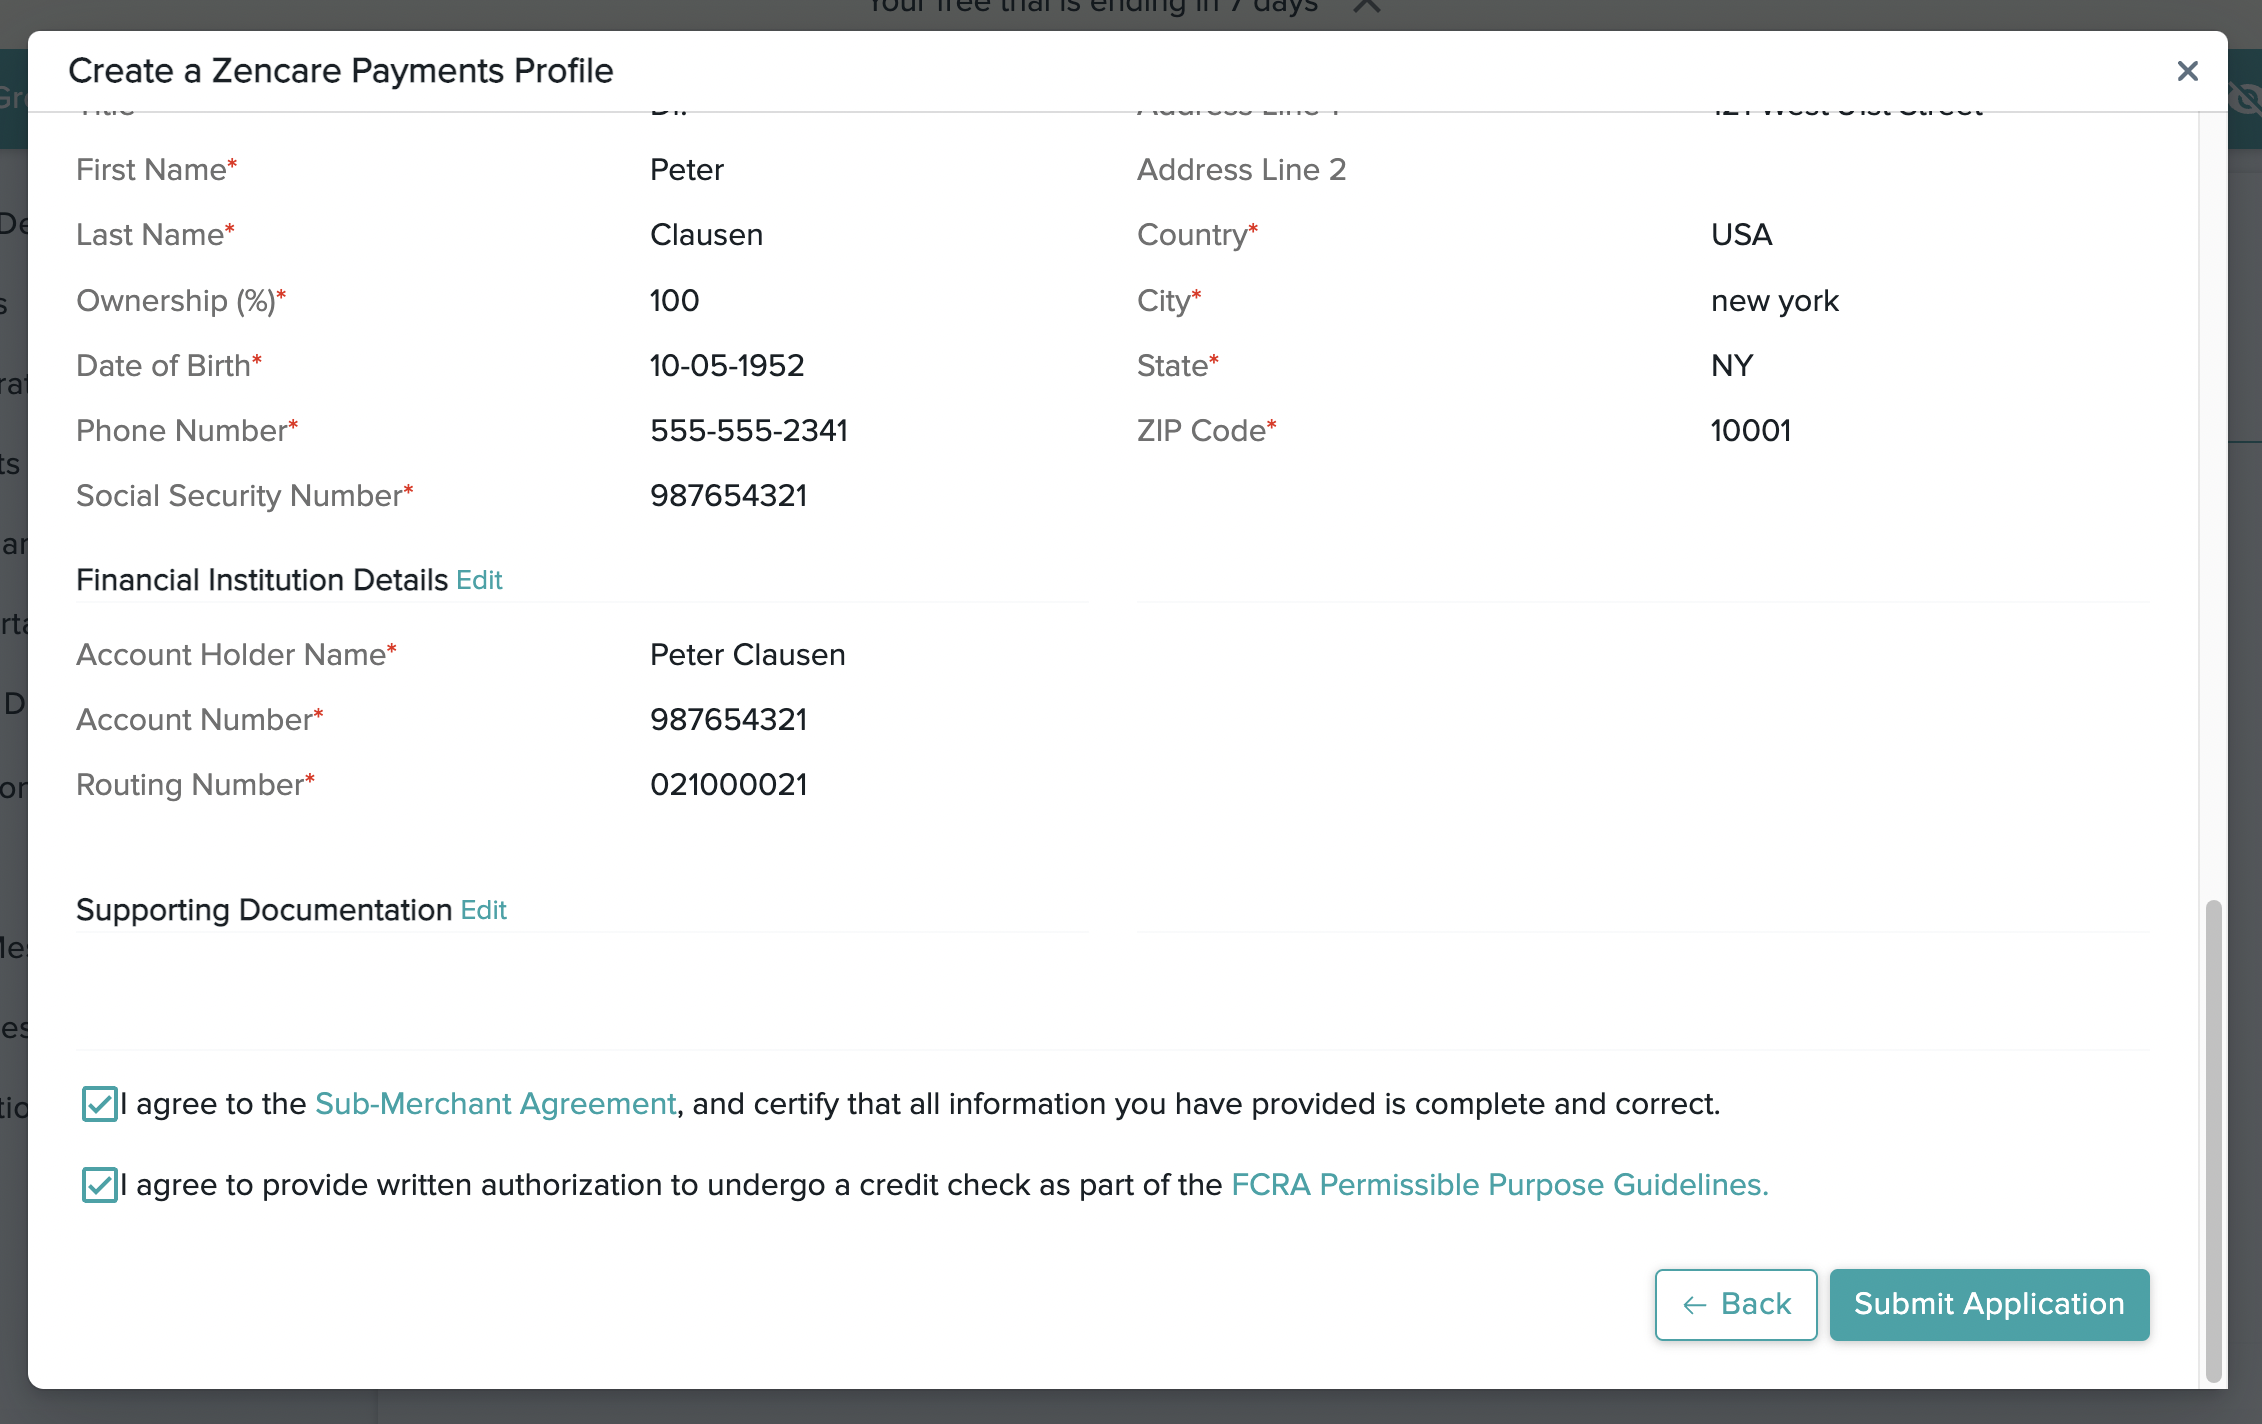
Once your application has been fully completed, you’ll need to flag the checkboxes indicating that you’ve read through and accepted the Sub-Merchant Agreement and give consent to undergo a credit check as per standard underwriting protocol. Both of these checkboxes must be flagged or the Submit Application button will not be clickable.
You will see a confirmation window upon submission of your merchant application. You can click the Done button to exit the application modal.

Your application will be submitted to our payment processing partner for underwriting and adjudication. This process typically takes 24-48 business hours to complete, notwithstanding any additional documentation or supporting data that may be needed by the underwriting team if the application submitted lacks clarity. You’ll be notified when the application is fully approved so you can begin processing transactions.
Completing the application also registers you for a new merchant account with Zencare Practice Management’s payment processing partner. If you already have a merchant processing account in good standing with this processor, your application will move through the approval cycle more quickly.
While your application goes through underwriting and adjudication, the status will be displayed in your Zencare Practice Management account in Settings > Payment Details. You can check back for updates, but if anything additional is needed the underwriters will notify you via email.

When your application has been approved, the status will be displayed as Active and you can start capturing credit card and bank account details for your clients that can be used to process their payments in American dollars.

You will also notice the Access Zencare Practice Management Payments button on this page. Clicking this button will redirect you to your merchant console account.