
View the instructional video, or follow the step-by-step instructions below!
Video guide
Note: The video has no sound.
Step-by-step instructions
(1) Enable your Client Portal
- Go to Settings > Therapists > Click the checkbox next to your name > Click Edit.
- Scroll down to the Client Portal subheading.
- Click Yes under “Use Client Portal.”
- Click the green Update Therapist button.

(2) Set your availability
- Under the same page (Settings > Therapists) > Click the checkbox next to your name > Click Availability at the top.
- Add or remove available slots.
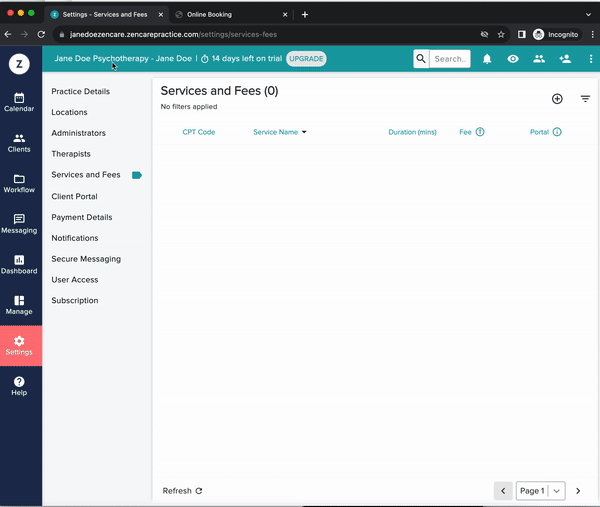
(3) Add phone consultations as a service
- Go to Settings > Services and Fees > Click the plus sign on the top right.
- Type in the Service Name (e.g. “Initial Phone Consultation”), Duration (e.g. 10min), Type (e.g. Individual), Fee ($0), and set your Availability for this service.
- Under Allow on Portal, select All Clients so that all prospective clients can book a free initial call with you.
- Under Bookable as Video, select Not Offered as a Video Session, unless you offer initial consultations over video call.
(4) Enable your booking page
- Go to Settings > Client Portal > You should be in the “General” tab (tabs can be found at the top) > Under “Allow clients to create account,” select “Yes - clients can create an account.” Click "Save."
- Go to the Booking tab at the top > Under “Enable Booking Page,” select “Yes - Enable.” Click "Save."

(5) Display your booking link on your Zencare profile
- Head to the Zencare Members Portal, where you can manage your Marketing profile. Log in if you aren't logged in. Trouble logging in? You can recover your login information here.
- Your booking link should be automatically accessible and visible under Client Referrals > Call Calendar.
- Turn the toggle to Enable Booking Link.
- Click View Profile in the left hand navigation. Now your profile should have a Book Appointment button that clients can click to be taken to your clinic's booking page!
